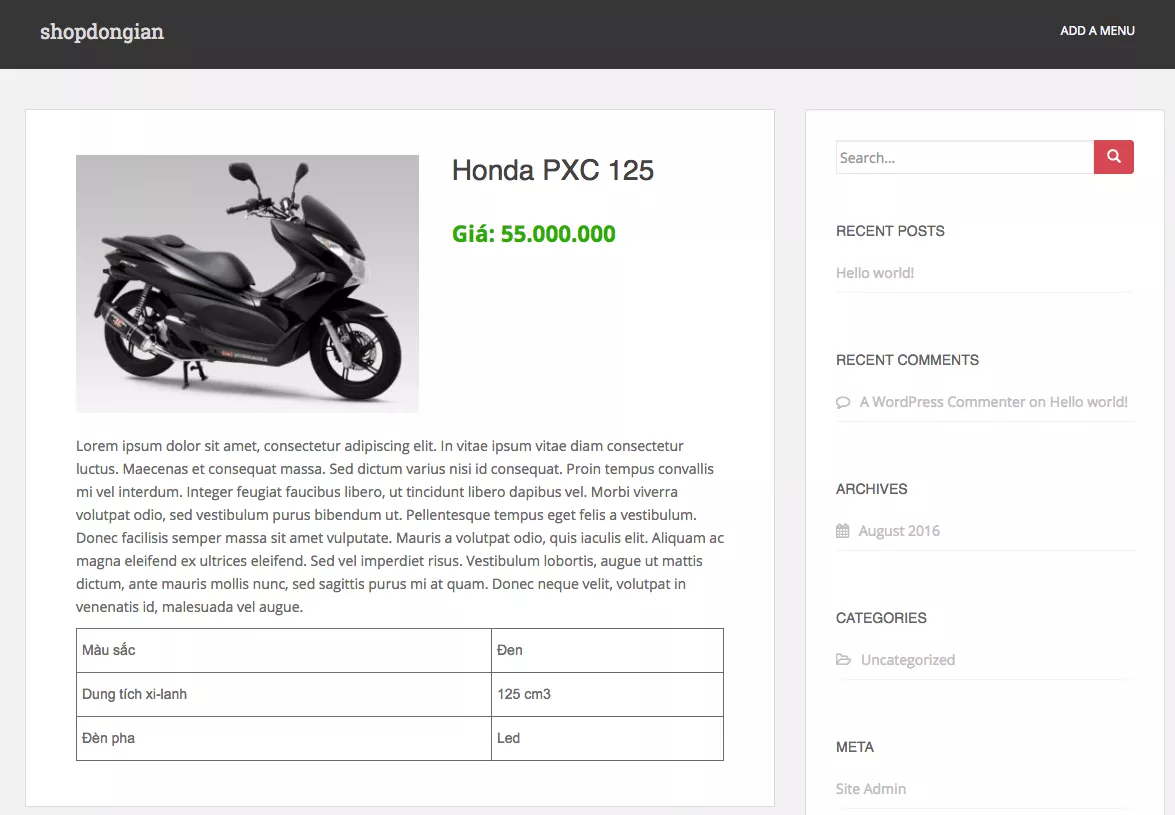
Sau khi đã làm xong các bước ở phần trước gồm tạo custom post type và các meta box hoàn thiện để quản lý sản phẩm. Trong bài này chúng ta sẽ cùng làm trang hiển thị chi tiết sản phẩm để hiển thị các thông tin mà chúng ta đã nhập vào như giá, thuộc tính sản phẩm,…
Tạo template hiển thị chi tiết sản phẩm
Như trong cấu trúc template của WordPress, nếu chúng ta sử dụng custom post type thì có thể sử dụng tập tin single-{post-type}.php để hiển thị nội dung thuộc post type đó với query mặc định của WordPress. Vì vậy, chúng ta sẽ tạo ra tập tin này, nhưng tốt hơn hết là copy từ tập tin /sparkling/single.php để đảm bảo cấu trúc phù hợp với theme đang sử dụng.
Chúng ta có post type là sanpham nên sẽ cần có tập tin single-sanpham.php để hiển thị nội dung của một sản phẩm. Chúng ta copy tập tin /sparkling/single.php thành /sparkling-child/single-sanpham.php nhé, sau đó mở ra tìm:
<?php get_template_part( ‘content’, ‘single’ ); ?>
Thay thành
<?php get_template_part( ‘content’, ‘single-sanpham’ ); ?>
Ở code trên tức là tập tin single-sanpham.php sẽ gọi content-single-sanpham.php ra mà hiển thị. Nhưng ta chưa có tập tin content này, do vậy hãy copy từ /sparkling/content-single.php thành /sparkling-child/content-single-sanpham.php. Sau đó đổi nội dung tập tin /sparkling-child/content-single-sanpham.php thành:
</pre>
<pre><?php
/**
* @package sparkling
*/
?><article id="post-<?php the_ID(); ?>" <?php post_class(); ?>>
<div class="post-inner-content">
<header class="entry-header page-header">
<div class="left">
<?php if (has_post_thumbnail( $post->ID )) : ?>
<?php the_post_thumbnail( ‘sanpham_thumb’ ); ?>
<?php endif; ?>
</div>
<div class="right">
<h1 class="entry-title "><?php the_title(); ?></h1>
<div class="entry-cat"><?php the_taxonomies( $args ); ?></div>
<div class="entry-price">Giá: <?php echo get_post_meta( $post->ID, ‘sanpham_price’, true ); ?></div>
</div></header><!– .entry-header –>
<div class="entry-content">
<?php the_content(); ?><div class="sanpham_att">
<?php $sanpham_atts = get_post_meta($post->ID, ‘sanpham_attributes’, false); ?>
<table class="sanpham_att_table">
<?php
foreach ($sanpham_atts as $atts) {
foreach ($atts as $att) {?>
<tr class="sanpham_att_table_row">
<th><?php echo $att; ?></th>
<th><?php echo $att; ?></th>
</tr>
<?php }
}
?>
</table>
</div>
<?php
wp_link_pages( array(
‘before’ => ‘<div class="page-links">’.esc_html__( ‘Pages:’, ‘sparkling’ ),
‘after’ => ‘</div>’,
‘link_before’ => ‘<span>’,
‘link_after’ => ‘</span>’,
‘pagelink’ => ‘%’,
‘echo’ => 1
) );
?>
</div><!– .entry-content –><footer class="entry-meta">
<?php if(has_tag()) : ?>
<!– tags –>
<div class="tagcloud"><?php
$tags = get_the_tags(get_the_ID());
foreach($tags as $tag){
echo ‘<a href="’.get_tag_link($tag->term_id).’">’.$tag->name.'</a> ‘;
} ?></div>
<!– end tags –>
<?php endif; ?></footer><!– .entry-meta –>
</div><?php if (get_the_author_meta(‘description’)) : ?>
<div class="post-inner-content secondary-content-box">
<!– author bio –>
<div class="author-bio content-box-inner"><!– avatar –>
<div class="avatar">
<?php echo get_avatar(get_the_author_meta(‘ID’) , ’60’); ?>
</div>
<!– end avatar –><!– user bio –>
<div class="author-bio-content"><h4 class="author-name"><a href="<?php echo get_author_posts_url(get_the_author_meta( ‘ID’ )); ?>"><?php echo get_the_author_meta(‘display_name’); ?></a></h4>
<p class="author-description">
<?php echo get_the_author_meta(‘description’); ?>
</p></div><!– end .author-bio-content –>
</div><!– end .author-bio –>
</div>
<?php endif; ?></article><!– #post-## –>
Trong đó bạn lưu ý chỗ này là hiển thị giá:
<div class="entry-price">Giá: <?php echo get_post_meta( $post->ID, ‘sanpham_price’, true ); ?></div>
Và chỗ này là hiển thị danh sách các thuộc tính sản phẩm đã thêm vào sản phẩm:
<div class="sanpham_att">

   <?php $sanpham_atts = get_post_meta($post->ID, ‘sanpham_attributes’, false); ?>

   <table class="sanpham_att_table">

      <?php

      foreach ($sanpham_atts as $atts) {

         foreach ($atts as $att) {?>

            <tr class="sanpham_att_table_row">

               <th><?php echo $att; ?></th>

               <th><?php echo $att; ?></th>

            </tr>

         <?php }

      }

      ?>

   </table>

</div></pre>

<pre>
Nếu bạn không hiểu tại sao thì cứ xem video nhé, trong video mình có giải thích rõ hơn.
Cuối cùng là chúng ta thêm CSS để trang hiển thị chi tiết sản phẩm hiển thị đúng hơn:
/**
* Trang hiển thị chi tiết sản phẩm
*/
.entry-header {
display: block;
overflow: auto;
}
.entry-header .left {
float: left;
margin-right: 1em;
width: 53%;
}
.entry-header .right {
float: right;
width: 42%;
}
.entry-price {
font-weight: bold;
color: #1dad1d;
font-size: 1.6em;
}.sanpham_att_table {border-collapse:collapse;border-spacing:0;width: 100%;}
.sanpham_att_table td{font-family:Arial, sans-serif;font-size:14px;padding:10px 5px;border-style:solid;border-width:1px;overflow:hidden;word-break:normal;}
.sanpham_att_table th{font-family:Arial, sans-serif;font-size:14px;font-weight:normal;padding:10px 5px;border-style:solid;border-width:1px;overflow:hidden;word-break:normal;}
.sanpham_att_table .sanpham_att_table_row{vertical-align:top}
Bây giờ tạm thời chúng ta có kết quả như sau:

Nhưng có vẻ thiếu thiếu gì ấy nhỉ? À, thiếu cái nút đặt hàng, ở bài sau mình sẽ hướng dẫn cách làm một cái form đặt hàng đơn giản nhưng khá tiện lợi để khách đặt hàng thông qua plugin NinjaForm nhé.
